
Repair at a Glance
| Device | MacBook Pro A1502 (EMC 2835) — 13-inch Retina, 2013–2015 |
| Issues | Cracked Retina display (upper-left corner) + speaker crackling at mid–high volume |
| Display Fix | Grade A pre-owned Retina assembly — approx. $150 |
| Speaker Fix | Brand-new OEM-spec replacement speakers |
| Bonus Work | Thermal paste replacement + internal dust cleaning |
| Outcome | Fully functional — display, audio, and thermals all restored |
What Came Through the Door

Older Retina MacBooks keep finding their way into the shop, and the A1502 is one of the common ones we see. This particular unit came in with two separate problems: a cracked screen and crackling speakers. The damage to the display was caused by a short drop — a fracture in the upper-left corner had spread far enough to block roughly a quarter of the screen. The speakers were producing noticeable distortion whenever the volume was pushed past mid-level.
Neither issue was a surprise given the age of the machine. But before anything else, the question is always the same: does a repair make financial sense here?
There are a lot of variables that go into that decision. Especially considering the age of this machine. We’ll get into that thought further down.
Diagnosing the Problems
Cracked Retina Display
The fracture in the upper-left corner had spread enough to make normal use impractical. On the MacBook Pro A1502, the screen is a full Retina display assembly — the glass, LCD panel, and aluminum housing are all sold as a single unit. There’s no option to replace just the glass.
One thing worth knowing: new OEM displays for this model are no longer manufactured. Most replacement screens available today are salvaged assemblies, graded by cosmetic condition. The client opted for a Grade A pre-owned Retina display at approximately $150. Despite the age of the machine, Retina panels hold their value because of the resolution and build quality — and this one arrived in excellent shape.
Speaker Crackling
Speaker distortion is one of the most predictable issues on aging MacBooks. Over time, the internal speaker cones weaken, adhesives degrade, and the membrane begins to tear. The result is crackling that gets worse at higher volumes — especially in lower frequencies.
Unlike the display assembly, replacement speakers for the A1502 are still widely available and inexpensive. Brand-new units were installed rather than salvaged ones.
The Repair Process
Step 1 — Battery Disconnect
Before opening any MacBook, the battery has to come off first. This model is known to power on automatically when the lid is opened, and working on a live logic board creates real risk. Skipping this step can result in:
- Shorted connectors
- Burned components
- Damaged flex cables
It takes a few extra seconds and eliminates those risks entirely.
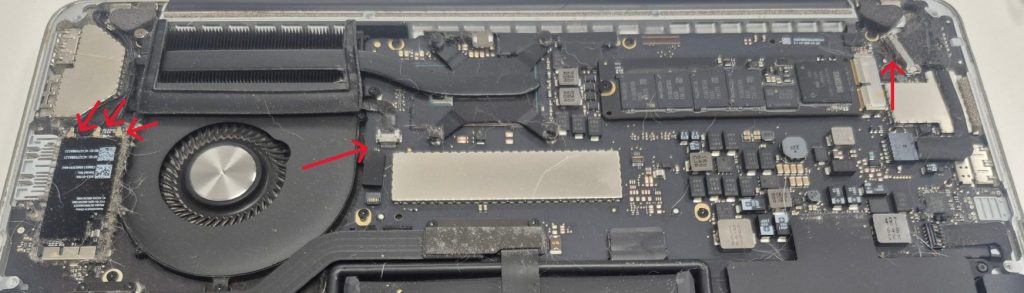
Step 2 — Speaker Replacement
Speaker replacement on this model is straightforward but requires careful connector handling. The left speaker sits behind a small bridge cable connecting the USB daughter board — that cable has to come out first to create enough clearance to safely detach the speaker connector.
MacBook connectors are fragile. A plastic pry tool and gentle lifting from the connector edge — never from the cable itself — is the right technique. Once clear, the speakers are secured by a few screws and swap out cleanly.
After installation, the new speakers produced clean audio with zero distortion across all volume levels.
Step 3 — Screen Replacement
The display swap is the more involved of the two repairs. Before the screen assembly can be removed, several components need to be carefully disconnected from the logic board:
- Display data cable
- Wi-Fi antenna cables
- Webcam cable
- Backlight connector
The webcam cable deserves extra attention — it tears easily if pulled at the wrong angle. Slow and deliberate removal is necessary.
Once all connectors are free, the hinge screws and support bracket can be removed and the cracked assembly lifts out. Installing the replacement is the reverse process, with one important detail: alignment. Pre-owned assemblies can vary slightly in fit, so verifying screw placement and seating prevents hinge issues down the road. This unit fit perfectly.
Step 4 — Preventative Maintenance
Any time a MacBook is already apart, it makes sense to address the basics. Since the machine was open, internal dust buildup was cleared and the thermal paste on the CPU was replaced.
Thermal paste degrades over time. When it dries out, heat transfer between the processor and heatsink drops, temperatures climb, and fans get louder. Fresh paste improves cooling efficiency and extends the lifespan of the machine — a small addition that adds real value to the overall repair.
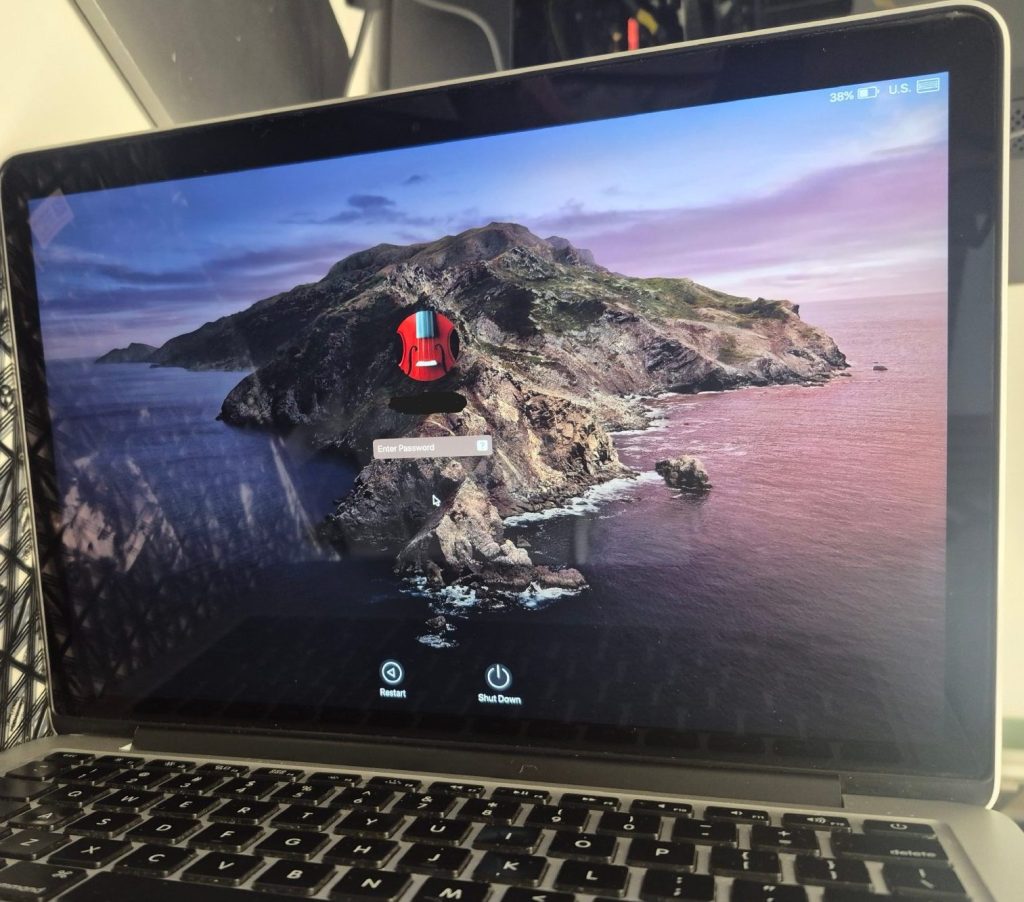
Results After Reassembly
- Retina display — no dead pixels, no backlight bleed, no artifacts
- Speakers — clean audio at all volume levels, no distortion
- Thermals — running noticeably cooler with better fan behavior
Is Repairing a MacBook Pro A1502 Worth It?
Honestly, it’s not a straightforward answer. The A1502 was released between 2013 and 2015, making this machine over a decade old. That alone introduces a range of variables that needs to be considered before committing to any repair.
Some of the key factors we consider: What is the overall condition of the machine beyond the reported issue? Is the battery still holding a charge? Are there any signs of prior liquid or logic board damage? What is the client’s actual use case for this device, and what would a realistic replacement cost them? There are a lot of things to consider, and a repair that makes sense for one person may not make sense for another.
Parts availability is also becoming a real constraint. New OEM display assemblies for this model no longer exist, and the supply of quality used or refurbished screens will only shrink over time. That affects both cost and long-term repairability. We always mention these variables to clients before recommending anything as not knowing can lead to regrets or frustrations down the road.
Common Questions About This Repair
Can the MacBook Pro A1502 screen be repaired without replacing the whole assembly?
Technically it is possible. On the A1502, the glass, LCD, and aluminum housing are fused together and sold as a single unit. Individual glass or LCD replacement is not only impractical, but the risk of damaging other components are a lot higher.
Why are replacement screens for older MacBooks still expensive?
Retina panels hold their value because of the display quality and resolution. Even used, Grade A assemblies command higher prices than standard LCD replacements. Supply is also limited to salvaged units, since Apple no longer manufactures new screens for this model.
How do I know if my MacBook speakers need replacement vs. a software fix?
If crackling occurs consistently at certain volumes regardless of the audio source, and is absent through headphones, it’s almost certainly a hardware issue. Software-side audio resets rarely fix physical speaker degradation. The A1502’s speakers are inexpensive to replace, making it a straightforward repair.
Does thermal paste replacement make a noticeable difference?
Yes — especially on machines this age. Dried thermal paste causes higher CPU temperatures and louder fan behavior. After replacement, most users notice quieter operation and better sustained performance. It’s a low-cost step with a meaningful impact.
Key Takeaways from This Repair
- Always disconnect the battery first — MacBooks can power on automatically when opened
- Grade A pre-owned displays are a viable option — but availability will only get tighter as these machines age
- Connector handling is where things go wrong — plastic tools and patience prevent most mistakes
- Preventative maintenance adds real value — thermal paste and dust cleaning cost little when the machine is already open
- The A1502 is still worth repairing — but the window for sourcing quality parts is narrowing
Have a MacBook with a cracked screen or failing speakers? Bring it in — we’ll give you an honest assessment before any work starts.
